
How to Prime Vape Coils
By Guy Hurley
May 18, 2026

Priming vape coils is a crucial step for any vaper. It ensures a smooth and flavourful experience. Without proper priming, you risk dry hits and a burnt taste.
This guide will walk you through the essential steps for priming vape coils. Whether you're a beginner or an experienced user, these tips will enhance your vaping.
Priming involves saturating the coil's wick with e-liquid before use. This process prevents damage and extends the coil's lifespan. Understanding how to prime coils correctly can significantly improve your vaping experience. It also helps in maintaining the performance of your vape kit.
Let's dive into the details and learn how to prime vape coils effectively. Your vaping experience will thank you.
What Is Vape Coil Priming and Why Is It Important?
Vape coil priming refers to the process of preparing a new coil for use. It involves saturating the coil with e-liquid before vaping. This prevents harsh dry hits and prolongs coil life.
Priming is essential for a few reasons:
- Ensures even e-liquid absorption to avoid dry spots.
- Enhances both flavour and vapor production.
- Helps prevent premature coil burnout.
Without proper priming, you might experience unpleasant tastes and damages to the coil. These issues can lead to frequent replacements, adding unnecessary costs.
The importance of priming cannot be overstated. Properly primed coils deliver a consistent and enjoyable vaping experience. Understanding and practicing good priming techniques is beneficial for all vape users.
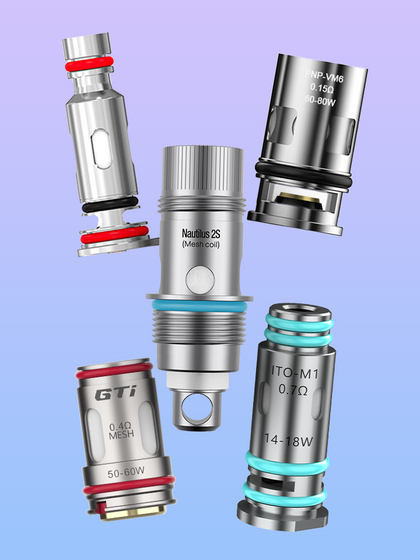
Understanding Vape Coils: Types and How They Work
Vape coils are fundamental components of refillable pods and vape tanks. They are responsible for heating the e-liquid, converting it into vapor. Coils come in various types, each influencing vapor production and flavour differently.
Common types of vape coils include:
- Standard Wire Coils: Simple and widely used, offering reliable performance.
- Mesh Coils: Known for faster heating and enhanced flavour due to larger surface area.
- Ceramic Coils: Provide pure taste and longer lifespan by reducing dry hits and hot spots.
Understanding how these coils work aids in selecting the right one for your device. Coils heat the e-liquid via electrical resistance, turning it into vapor. The type of material and structure impacts vaping quality and experience. Selecting an appropriate coil can significantly enhance your vaping satisfaction.
Step by Step Guide: How to Prime Vape Coils
| Start by applying a few drops of e-liquid onto the coil. This helps saturate the wick inside the coil. Be sure not to flood it; just enough to wet the wick evenly. |  |
| After applying the e-liquid, gently blow on the coil. This action aids in dispersing the liquid throughout the wick. It's a small step that makes a significant difference in the end results. |  |
| Next, carefully reassemble your vape tank. Ensure all parts are tightly secured to prevent any leaks or e-liquid waste. Proper assembly is crucial for device functionality. |  |
| Once the tank is reassembled, fill it with e-liquid. Use your preferred e-liquid and fill to the recommended level. Be mindful not to overfill to avoid spilling. |  |
| Allow the filled tank to sit for a few minutes. This resting period lets the e-liquid fully saturate the wick. Typically, a waiting time of 5-10 minutes is best. |  |
|
Take a few dry pulls. This involves inhaling through the mouthpiece without activating the battery. Doing this helps draw e-liquid into the coil. Finally, start vaping at a lower wattage. Gradually increase to your desired level. This approach helps the coil adjust to the e-liquid and avoid burning. |
 |
Follow these steps regularly whenever you install a new coil. Proper priming significantly improves your vaping experience. Enjoy smoother draws and better flavour consistently.
How Long to Wait for Coils to Prime Vape
The waiting time for your coils to prime can vary based on several factors. Typically, it's best to wait between 5 to 30 minutes. This duration allows the e-liquid to completely soak into the wick.
Patience is key in this process. Rushing the prime may result in dry hits or burnt taste. For more information on dry hits and avoiding burnt tastes, check out our: Why Does My Vape Taste Burnt? blog.
To determine the perfect waiting time, consider the type of coil and e-liquid viscosity.
Here's a quick guide to help you decide:
- Standard Coils: 5-10 minutes
- Sub ohm Coils: 10-20 minutes
- Higher VG E-liquids: Up to 30 minutes
Always adjust based on your specific equipment and experience. The right wait ensures a better vaping experience.
Common Mistakes to Avoid When Priming Coils
Priming coils seem straightforward, but some common errors can affect performance. Avoid these mistakes to ensure the best experience.
Firstly, avoid flooding the coil with excessive e-liquid. Over-saturation can lead to leaking and gurgling sounds. Always aim for a balanced saturation.
Another mistake is rushing the process. It's tempting to start vaping right away, but this can cause a burnt taste. Always allow ample time for the e-liquid to soak in.
By bypassing these errors, you can enjoy improved flavour and longer coil lifespan.
Tips for Maximizing Coil Lifespan and Performance
Maximizing coil lifespan and performance begins with regular maintenance.
- Clean your vape kit and coils frequently: Prevent residue build-up, which can degrade performance.
- Choose the right e-liquid for your device and coil type: High-quality e-liquids with appropriate viscosity help maintain optimal coil conditions.
- Adjust your device's settings according to the coil's resistance: Appropriate wattage levels extend coil life and enhance vapor quality.
Conclusion
Priming your vape coils is simple yet essential. It prevents dry hits and improves flavour and vapor production. By following these steps, you enhance your vaping experience and extend your coil's lifespan. Enjoy a smoother, more satisfying vape journey.
Leave a comment