
Why Is My Pod Not Working
By Guy Hurley
Jun 16, 2026

There is nothing quite as frustrating as expecting a smooth, satisfying draw from your device, only to be met with a blinking light, a mouthful of e-liquid, or absolutely nothing at all.
Pod kits have revolutionised the vaping industry with their compact convenience and ease of use, but their small, intricate components can sometimes be finicky.
When you have a vape not working, the solution is usually much simpler than you think. You rarely need to replace the entire device. With a little bit of knowledge and some basic vape troubleshooting, you can diagnose and fix almost any issue in a matter of minutes.
We will walk you through every possible reason your device is failing. From fixing pod kit connection issues to understanding complex blinking light codes meaning by brand, we will cover every angle. Grab your malfunctioning vape kit, and let’s bring it back to life.
The Basics: Find the Problem
Before diving into complex repairs, we need to find the issue. When determining why is my vape pod not working, the problem will almost always fall into one of three categories:
- Power and Battery Issues: The device isn't turning on, isn't holding a charge, or the sensors aren't recognising your draw.
- Connection Issues: The battery has power, but it isn't communicating with the pod.
- Airflow and E-Liquid Issues: The device fires, but it leaks, spits, tastes burnt, or produces no vapor.
By identifying the symptom, you can fast track your way to the correct solution. Let’s explore each of these categories in granular detail.
Power and Charging Troubleshooting
If your device is completely dead or flashing strange colours when you plug it in, you are likely dealing with a power delivery issue.
Pod Kit Not Charging Battery Indicator
One of the most common complaints is a pod kit not charging battery indicator failing to light up when plugged in. When you connect your device to a USB cable, a LED light should illuminate to confirm power delivery. If it remains dark, check the following:
-
The Charging Port: Pocket lint, dust, and microscopic debris love to hide inside USB-C and Micro-USB ports. When lint gets packed at the bottom of the port, the charging cable cannot make a solid connection. Use a wooden toothpick (never metal, as it can short the internal pins) to gently scrape the bottom of the port. We also recommend using a cotton bud (Q-Tip) to clean up any residue or fallout.
- The Cable and Power Source: Vape batteries are small and require low-amp charging. Fast-charging bricks designed for modern smartphones can sometimes overpower the pod kits internal regulator, causing the device to refuse the charge as a safety mechanism. Switch to a standard 1-Amp charging block or plug it directly into a computer USB port.
- Internal Battery Degradation: If your device is over a year old and has been charged daily, or overnight, the internal lithium-ion cell may have naturally degraded past the point of holding a charge. In this case, the battery portion will need replacing.
Mastering Connection and Sensor Problems
If your battery is fully charged but the device still won't fire, you are likely dealing with a physical disconnect between the battery and the pod.
Fixing Pod kit Connection Issues
Your pod kit relies on two small metal pins inside the battery housing to send electricity to the metal contacts on the bottom of the pod. If this bridge is broken, the vape will not fire.
Fixing pod kit connection issues starts with a visual inspection. Remove your pod and look inside the battery. You will see two spring-loaded pins. Sometimes, if a pod is pushed in too aggressively, one of these spring-loaded pins gets jammed in the "down" position.
- The Fix: Take a pair of fine-tipped tweezers or a tiny flathead screwdriver and very gently nudge the stuck pin. Often, a tiny tap will release the spring mechanism, causing the pin to pop back up into its proper position.
Cleaning Battery Terminal Contact Points
e-liquid is an excellent insulator. If even a microscopic drop of vape juice leaks onto the metal contacts, it will block the electrical current. Routine cleaning is mandatory for optimal performance.
How to perform a deep clean:
- Remove the pod and set it aside.
- Lightly dampen a cotton swab with high-percentage isopropyl alcohol (rubbing alcohol). Do not soak it, you want it damp, not dripping.
- Swab the inside of the battery housing, paying special attention to cleaning battery terminal contact points.
- Use the dry end of the cotton swab to absorb any remaining moisture.
- Wipe down the contacts on the bottom of the pod itself.
- With a dry cotton swap also clean up any liquid on your pod.
- Let everything air dry for 5 minutes before reassembling.
Troubleshooting Draw Activated Firing Sensor
Most modern pod vapes lack a physical fire button, relying instead on an "auto-draw" sensor. When you inhale, air passes over a tiny microphone-like sensor, which detects the change in air pressure and triggers the battery to fire.
Troubleshooting draw activated firing sensor issues is necessary when the device fires sporadically or requires you to pull uncomfortably hard. The primary killer of auto-draw sensors is internal e-liquid leakage. If juice seeps into the tiny sensor hole (usually located between the connector pins), it blocks the airflow detection.
The "Blow-Through" Fix: Remove the pod. Place a paper towel over the top opening of the battery housing. Put your lips against the USB charging port at the bottom of the device and blow sharply into the port. This reverse pressure forces trapped e-liquid out of the internal sensor pathway and onto your paper towel. Repeat this until no more liquid comes out. Use a cotton swab to clean the housing, reinsert the pod, and test the draw.
4. Resolving E-Liquid and Coil Frustrations
Sometimes the device functions perfectly on an electrical level, but the actual vaping experience is terrible. If you are experiencing a harsh throat hit, no flavour, or immediate burning, the issue lies within your pod, your coil, or your e-liquid.
How to Prime a New Vape Pod
The most common mistake beginners make is filling a brand-new pod and hitting it immediately. Inside your pod is a heating coil wrapped in dry organic cotton. If you fire the device while that cotton is dry, it will instantly burn.
Knowing how to prime a new vape pod is the most crucial step in vaping maintenance:
- Fill the new pod completely with your chosen e-liquid.
- Wait 10 to 15 minutes. This allows the viscous liquid to fully saturate the dense cotton wicking material.
- Before putting the pod into the battery, take three to four "dry pulls." Simply put the pod to your lips and inhale gently. This manual suction pulls the e-liquid deep into the centre of the coil.
- Insert the pod into the battery. If your device has adjustable wattage, start at the lowest possible setting for the first few puffs to break the coil in gently.
Burnt Taste in New Vape Pod
If you just installed a fresh pod and are already experiencing a harsh, acrid sensation in your throat, you are encountering a dry hit. A burnt taste in new vape pod setups is almost exclusively caused by improper priming (as mentioned above) or chain-vaping.
If you take multiple long, deep puffs in rapid succession (chain-vaping), the cotton does not have enough time to re-absorb liquid between hits. The coil heats up dry cotton, causing it to singe.
Important Note: Once vape cotton is burnt, it cannot be un-burnt. The chemical structure of the cotton has been altered. You cannot wash it or soak it to remove the burnt flavour. Unfortunately, you must discard the pod and start fresh, ensuring you prime the next one correctly.
E-Liquid VG PG Ratio for Pod kits
Not all vape juices are created equal. E-liquid consists of two primary base ingredients: Vegetable Glycerin (VG) and Propylene Glycol (PG).
- VG is thick, syrupy, and produces large clouds.
- PG is thin, carries flavour well, and provides a "throat hit."
Using the correct e-liquid VG PG ratio for pod kits is vital. Because the wicking holes on small pod coils are tiny, they struggle to absorb thick liquids.
- If you use a liquid that is 70% VG or higher (typically meant for large sub ohm tanks), the thick syrup will not wick fast enough, resulting in dry hits and rapid coil death.
- If you use a liquid that is 100% PG, it will be too thin and will likely leak straight through the bottom of the pod.
The Golden Rule: For almost all pod kits, you should use a 50/50 VG/PG or a 60/40 VG/PG ratio. This provides the perfect viscosity — thin enough to wick rapidly, but thick enough to prevent leaking.
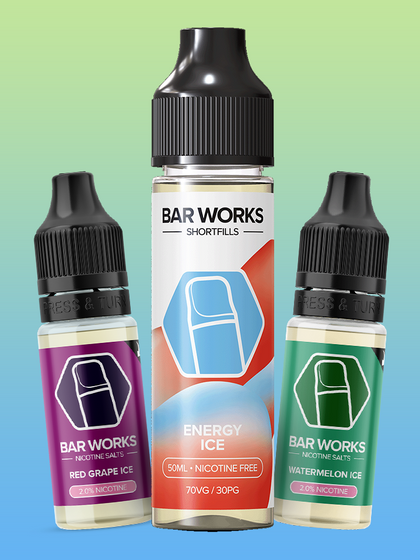
Salt Nicotine vs Freebase Liquid Compatibility
When choosing juice, you will face another choice: Nic Salt vs. Freebase. Understanding salt nicotine vs freebase liquid compatibility is essential for both your hardware and your comfort.
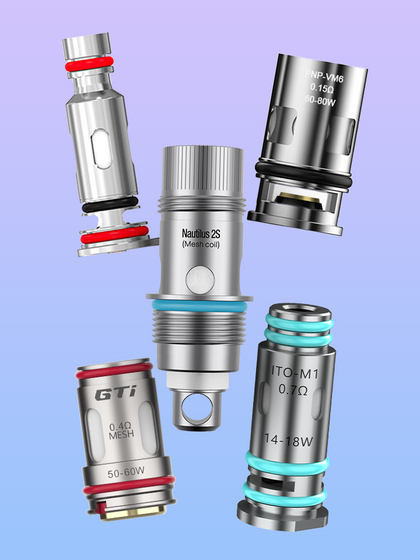
- Nicotine Salts (Salt Nic): This liquid has been chemically altered with benzoic acid to lower its pH level. This allows you to vape high concentrations of nicotine (20mg to 50mg) without experiencing a harsh throat hit. Salt nic is specifically designed for low-wattage, high-resistance pod kits (coils rated 0.8 ohm, 1.0 ohm, or 1.2 ohm).
- Freebase Nicotine: This is the purest form of nicotine. It has a high pH, meaning higher strengths (like 12mg or 18mg) will feel very harsh on the throat. Freebase is usually sold in lower strengths (3mg to 6mg) and is best suited for sub ohm, higher-wattage devices (coils rated 0.6 ohm and below).
If you put a 50mg Salt Nic liquid into a 0.2 ohm high-wattage pod, you will receive an overwhelmingly massive dose of nicotine that can make you sick. Conversely, if you put 3mg freebase in a 1.2 ohm low-wattage pod, you will likely feel nothing at all and receive poor flavour. Match your liquid type to your coil resistance!
5. Airflow, Leaks, and Spitting: Taming the Mess
You’ve got power, a solid connection, and the right juice. But suddenly, your device sounds like a bubbling cauldron, and you're getting liquid in your mouth. Why does this happen?
Why is My Vape Pod Leaking Into the Battery?
A leaking pod is the number one cause of permanent hardware failure. If you are constantly wondering, "why is my vape pod leaking into the battery?", consider these common culprits:
- Drawing Too Hard: Pod kits are designed for a gentle, "mouth-to-lung" draw (similar to drinking hot coffee through a small straw). If you pull on the mouthpiece as hard as you can, you create a vacuum effect inside the pod. This forced suction pulls liquid directly past the cotton and into the central chimney, where it inevitably leaks out the bottom.
- Overfilling: When filling a pod, you must leave a tiny air gap at the top. If you fill it to the absolute brim and push the rubber stopper in, the internal pressure pushes liquid out of the bottom wicking holes.
- Atmospheric Pressure: Taking your vape on an airplane or driving up a high-altitude mountain changes the atmospheric pressure, causing the liquid to expand and leak. Always empty your pods before flying!
- Heat Exposure: Leaving your vape in a hot car thins out the VG in the e-liquid. Once the liquid becomes too thin, the cotton can no longer hold it, and it drains into the battery.
Vape Pod Spitting Back Juice
Spit back occurs when a pool of liquid gathers directly on the heating coil. Instead of vaporizing smoothly, the liquid boils and pops — similar to dropping water into a hot frying pan. This results in hot droplets of e-liquid shooting up the mouthpiece and onto your tongue.
A vape pod spitting back juice usually means the coil is flooded. How to fix a flooded pod:
- Remove the pod from the device.
- Wrap a paper towel around the base of the pod.
- Hold the pod by the mouthpiece and flick your wrist sharply downward (like cracking a whip) into a sink or trash can. Centrifugal force will push the excess, pooled liquid out of the bottom airflow holes and into the paper towel.
- Wipe the pod clean, reinsert it, and take a few gentle puffs. The spitting should stop.
Steps to Unblock Vape Pod Airflow
If you try to take a drag and it feels incredibly tight, like sucking on a blocked straw, your airflow is compromised.
Follow these steps to unblock vape pod airflow:
- Check for External Blockages: Examine the tiny airflow pinholes on the sides of the battery device. Use a needle or pin to clear out any pocket lint, dirt, or hardened e-liquid crust that may be covering the air intakes.
- Clear the Chimney: Remove the pod. Take a small, tightly rolled piece of tissue paper or a specialized thin pipe cleaner and push it down the mouthpiece (the chimney). You will likely swab out a glob of dark, accumulated e-liquid that was choking the airflow.
- Check the Base: Look at the bottom of the pod where the air enters the coil. Make sure the rubber seals or plastic housing haven't melted or shifted to block the airpath.
Clearing Trapped Air Bubbles in Pod
Sometimes, a pod will mysteriously stop wicking even when it is mostly full. You may look closely and see a tiny air bubble trapped against the wicking port (the small hole where the white cotton is visible).
Because small pods have high surface tension, an air bubble can form a tight seal over the wicking hole. This prevents e-liquid from touching the cotton, leading to an unexpected dry hit. Clearing trapped air bubbles in pod setups is incredibly simple: remove the pod and tap it firmly against a table, or give it a few quick flicks with your finger. You will see the bubble dislodge and float to the surface, allowing the juice to flow freely back into the cotton.
6. Managing Expectations: Lifespan and Performance
A significant part of vape troubleshooting is understanding the physical limitations of your hardware. Pod are consumable items; they are not meant to last forever.
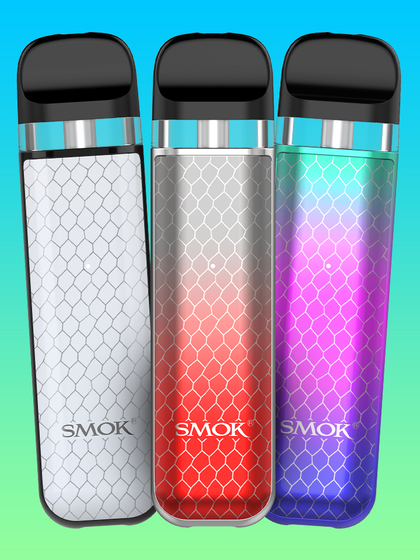
Refillable Pods vs Pre-Filled Pods Performance
When asking why is my vape pod not working, it helps to understand what kind of pod you are using.
- Pre-Filled Pods (Closed kits): Devices like Hayati Pro Max Plus 6000 or Vuse Ultra use prefilled pods. These are incredibly convenient but offer less control. If a prefilled pod fails, tastes burnt out of the box, or leaks, there is very little you can do other than clean the battery contacts and try a new pod. Because they are mass-produced, occasional "dud" pods are inevitable.
- Refillable Pods (Open kits): Devices like the Caliburn, XROS, or Nord give you total control. Comparing refillable pods vs prefilled pods performance, refillable generally offer superior flavour, thicker vapor, and massive cost savings over time. However, they require more user maintenance, such as proper priming, choosing the right VG/PG ratio, and monitoring coil degradation.
How Long Should a Vape Pod Last?
A common misconception is that a single pod will last an entire month. So, realistically, how long should a vape pod last?
Under normal vaping conditions, a high-quality refillable pod should last anywhere from 1 to 2 weeks, or approximately 15 to 25 ml of e-liquid.
However, lifespan is heavily dictated by the type of e-liquid you use:
- Sweeteners Destroy Coils: E-liquids that are exceptionally sweet (like dessert flavours, candies, or ultra-sweet iced fruits) contain sucralose. When sucralose is heated, it caramelizes and turns into a dark, sticky gunk. This "coil gunk" coats the heating element and clogs the cotton, leading to a burnt taste in just a few days.
- Clear, Simple Flavours Last Longer: Mints/menthols, and clear, unsweetened fruit flavours burn very cleanly, allowing your pods to easily reach that two-week mark.
If your pod's flavour tastes muted, the vapor production drops significantly, or the liquid inside the pod starts turning a dark brown/black colour, the coil is dead. It is time to dispose of the pod and replace it.
7. The Ultimate Step-by-Step Vape Troubleshooting Checklist
To summarize all the information above, if you find yourself staring at your device and groaning, "why is my vape pod not working again?", run through this quick checklist:
- Check the Lights: Plug it in. Is it charging? If not, clean the USB port and try a lower-amp plug. If it blinks when you hit it, consult your manual for the brand's specific light codes.
- Check the Contacts: Remove the pod. Are the gold pins clean and dry? Are they popping up freely? Swab them with isopropyl alcohol regardless.
- Check the Airflow/Sensor: Blow through the bottom charging port to clear out the auto-draw sensor. Unclog the mouthpiece with a tissue.
- Check the Pod/Coil: Did you prime it properly? Is there an air bubble blocking the wick? Is it flooded? (Flick it into a paper towel to clear spit back).
- Check the Juice: Are you using a 50/50 or 60/40 VG/PG ratio? Are you matching nic salts with high-resistance coils?
- Replace if Necessary: If you have tried all the above and it still tastes burnt or refuses to fire, the coil is dead. Toss the pod and prime a new one.
Leave a comment